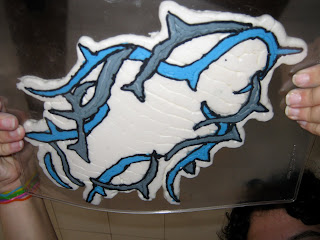
This is our first attempt at butter cream transfer.
My daughter wanted to make a cake for the birthday of one of her youth group leaders. We decided it would be fun to try out the butter cream transfer method on this cake.
We started by choosing the image we wanted on our cake. We chose the symbol for Mosaic Church. It is a crown of thorns in case you were wondering. :)
To have the image turn out right we needed to reverse the image. We did this by tracing the image on the other side of the page.
We chose the colors for our image and labeled the image to avoid confusion. After labeling we slipped the image into a plastic sleeve.
We then traced the image using a #2 tip and butter cream we had tinted black.
We filled in the first color using a #5 tip and butter cream tinted blue. We then added the second color was piped in using a #5 tip and butter cream tinted grey.
Here is the completed reverse image.
We traced the outer edge of the image and then filled in the area with butter cream using the same color we had on our cake. We piped using a #10 tip and then smoothed it with a small offset cake decorator spatula.
This is what the image looks like from underneath. Turned out nicely! :) At this point the transfer goes into the freezer for 45 minutes to an hour.
We flip our frozen image on to the cake and smoothed it into the cake. We carefully peeled the plastic off of our transfer.
My daughter then added the lettering. :)
Lovely results for our first attempt at butter cream transfer. Can't wait to use this technique again. It was fun!
Here's the video we watched to learn how to do this. :)
Butter Cream Transfer Technique


No comments:
Post a Comment